Fussy Cutting Panels

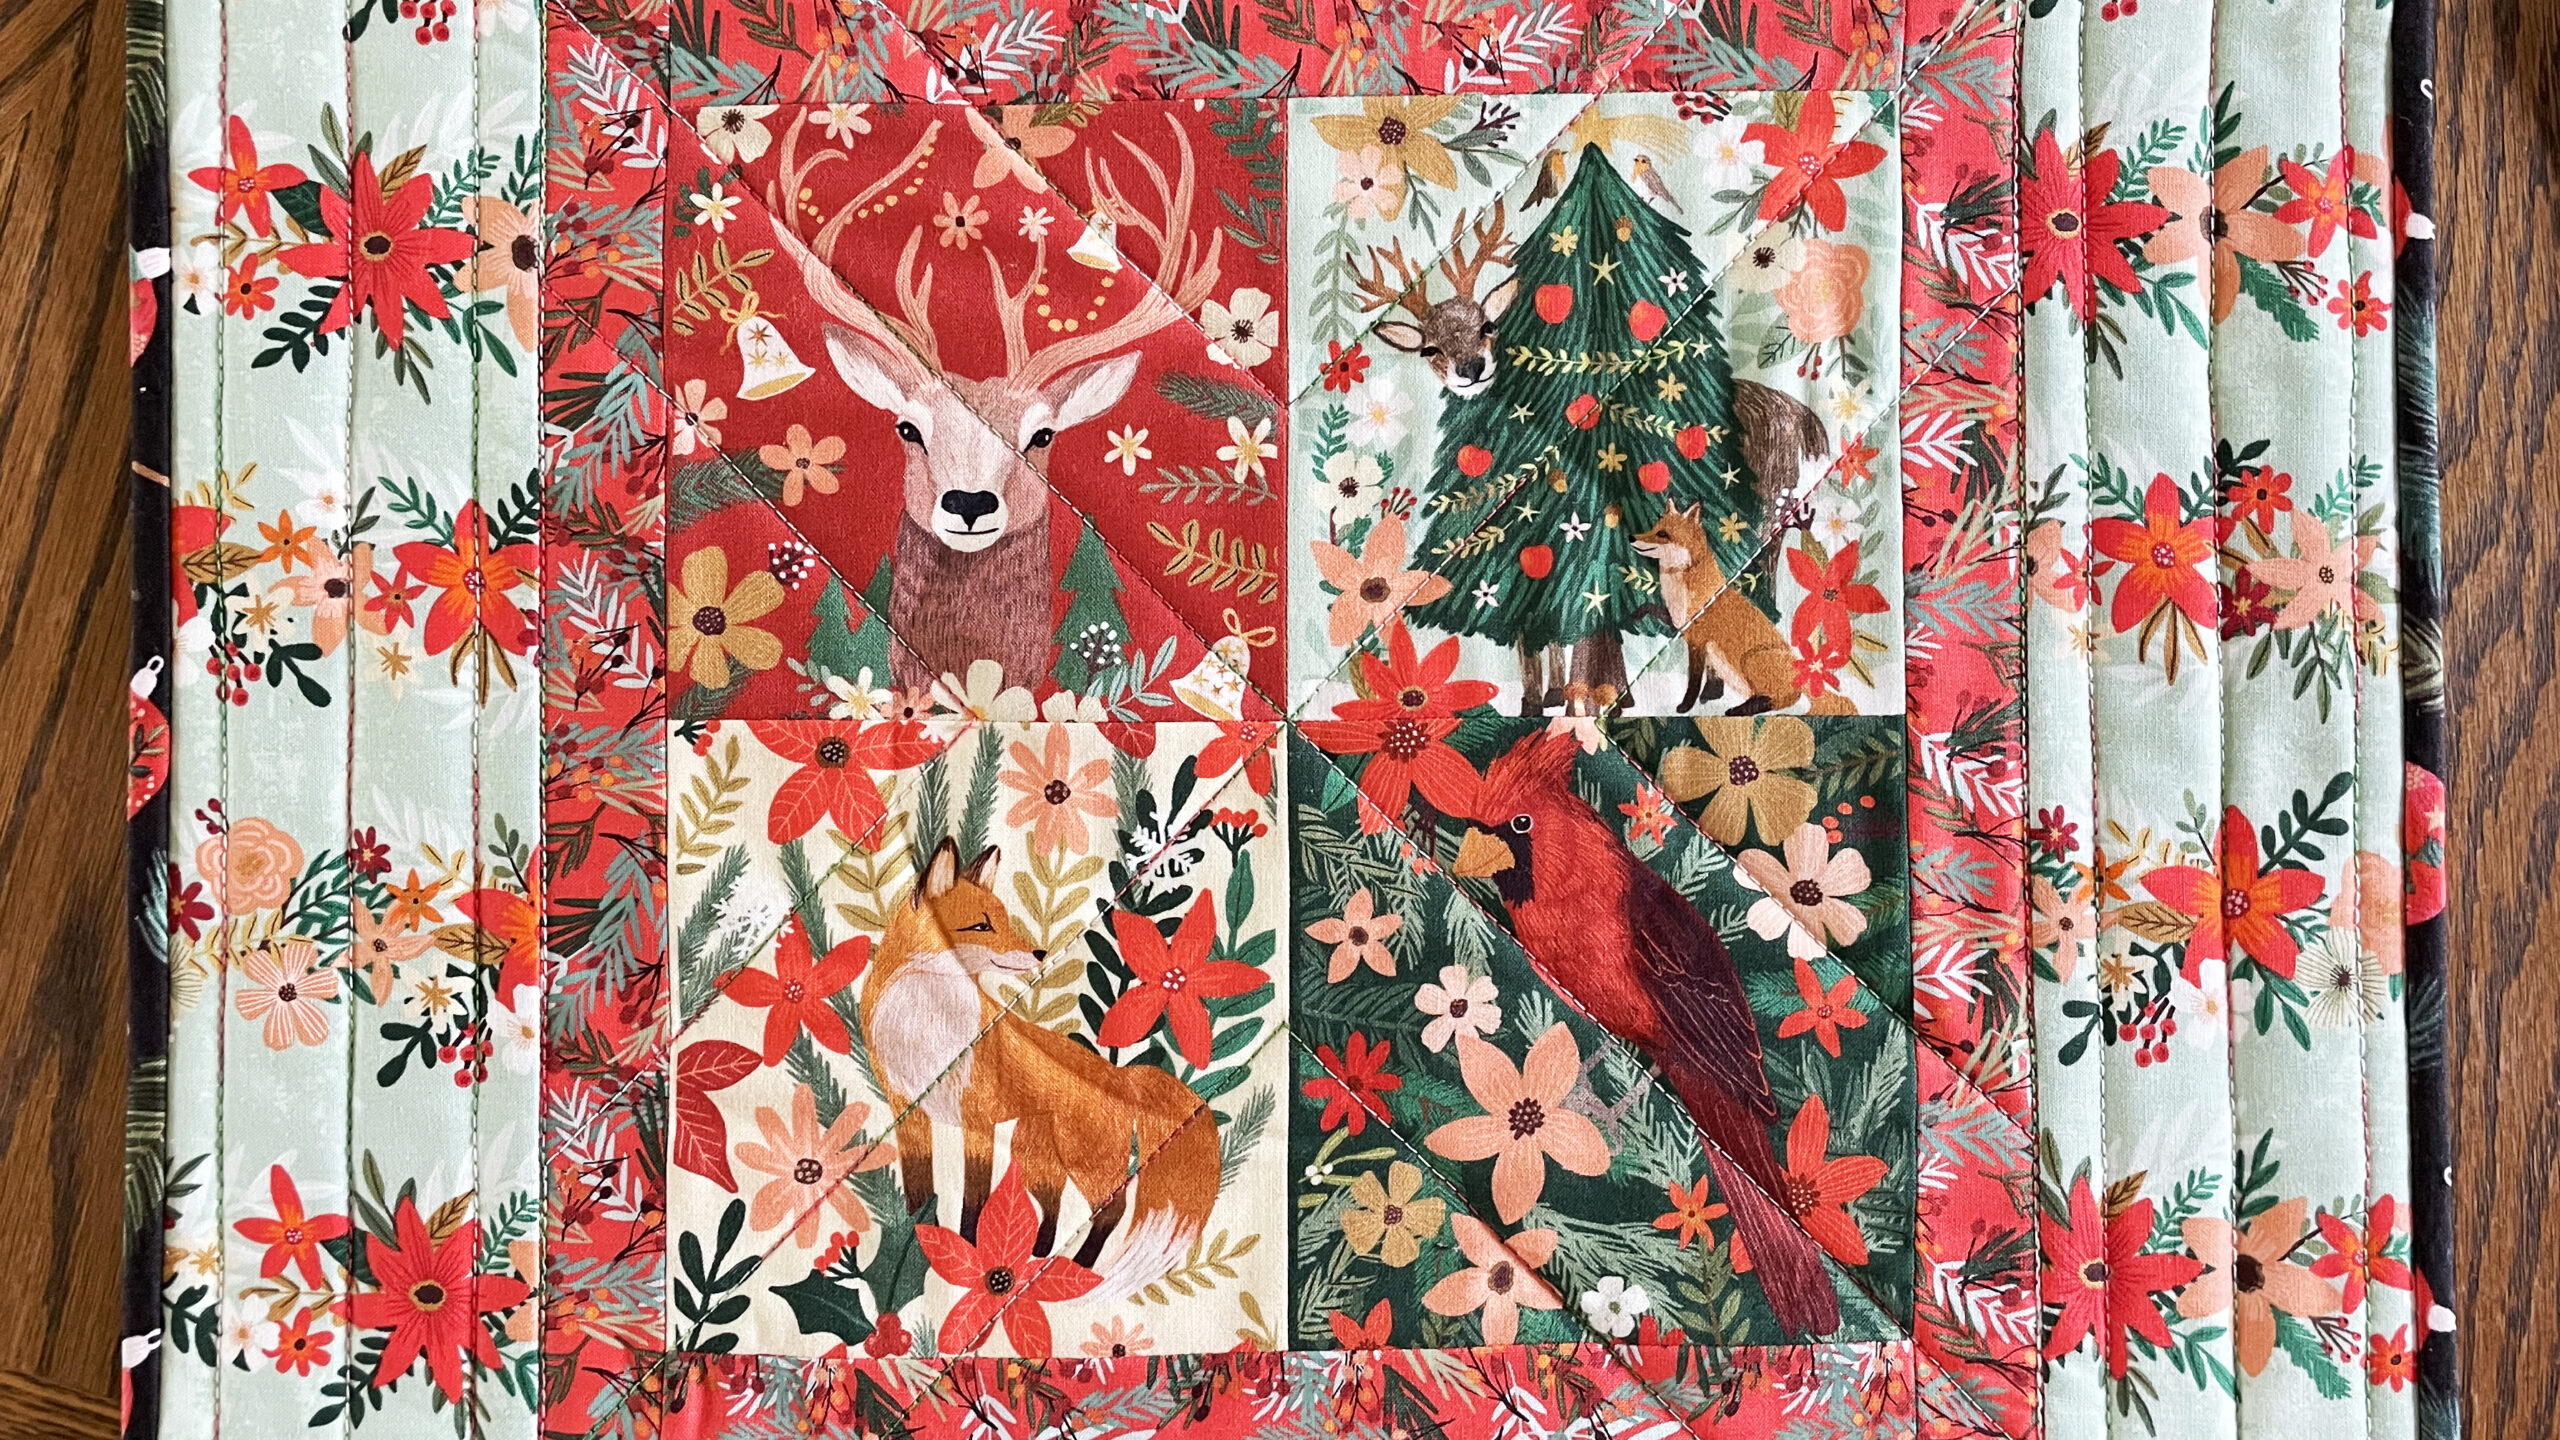
Get ready to up your fussy cutting game! In this tutorial, Stephanie Soebbing shares her favorite simple trick for perfectly centering your quilt panel designs — no more chopped-off antlers or missing tails! 🦌🌲
📘 Grab your SIGNED copy of The Panel Quilting Workshop here: https://stephaniesoebbing.com/product/the-panel-quilting-workshop-12-quick-and-easy-projects-for-every-season/
Using painter’s tape (or washi tape, or even Post-it notes in a pinch), she shows how to create a clear “window” on your ruler so you can preview exactly what will show in your finished block before you make the cut. Whether your panel is taller than it is wide or just not quite what you expected, this step-by-step method helps you adjust placement for beautiful, balanced results.
🧵 What you’ll learn:
- ✔️ How to mark your ruler for precise trimming
- ✔️ How to preview panel placement before cutting
- ✔️ Why taking the extra time pays off for perfectly centered blocks
📘 Grab your SIGNED copy of The Panel Quilting Workshop here: https://stephaniesoebbing.com/product/the-panel-quilting-workshop-12-quick-and-easy-projects-for-every-season/
If you must buy from Amazon, please use this link: https://amzn.to/3Lh8KC0
Syllabus
Get ready to up your fussy cutting game! In this tutorial, Stephanie Soebbing shares her favorite simple trick for perfectly centering your quilt panel designs. Using painter’s tape (or washi tape, or even Post-it notes in a pinch), she shows how to create a clear “window” on your ruler so you can preview exactly what will show in your finished block before you make the cut. You'll learn how to mark your ruler for precise trimming and be able to preview panel placement before cutting. We also go over why taking the extra time pays off for perfectly centered blocks.